How to Make Handmade Envelopes {With Homemade Envelope Glue}
I was put in a bit of a pickle when I first started getting into calligraphy and fake calligraphy. I loved the look of both, knew I wanted to put them on envelopes, but didn’t want to buy packs of envelopes in various colors and sizes. (Envelopes aren’t sold as singles….shocking, right?) Handmade envelopes were just the thing to solve my problem.

There’s two options to making homemade envelopes: using your desired envelope stuffer, tracing it, and creating your own template OR the option I chose, using envelope templates. Envelope templates seemed the simpler route. However, if you have something unusually shaped making your own template may be the route to go. Here’s some of the free envelope templates that I used in the following tutorial:
A2 (4 3/8″ x 5 3/4″)
A7 (5 1/4″ x 7 1/4″)
C6 (4 1/2 x 6 1/2)
And here’s how to make them:
How to Make Handmade Envelopes
First, print out your desired size.

Cut out your template.


Choose your paper–This is where you can make some unique choices for paper: use colored paper, magazines, old maps, decorative wrapping paper, or any fun and interesting paper you can get your hands on. I stuck with simple solid colors, but I’ve seen some great envelopes with some of the other types of paper as well. Place the template on top of your paper and trace it with a pencil.

Cut your traced envelope out with scissors.

If there are any remaining pencil lines, you can either erase them now or fold your envelope so they are on the inside of your envelope.
Lightly score where your envelope flap meets the front part of your envelope. This will make folding your envelope easier. (For those of you who don’t know, scoring is when you open up your scissors and run the point along the paper to make a scored line.)
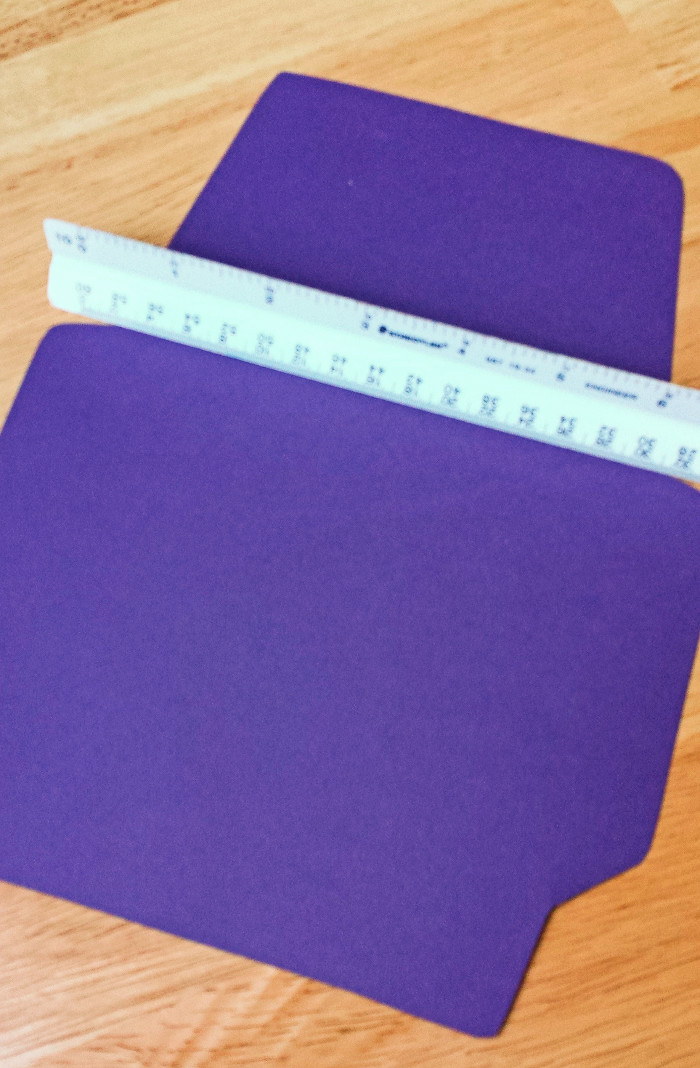


Fold all but the top flap in toward the center. You can play around with this, but generally the bottom flap goes on top of the two side flaps.
Make a light pencil line on the bottom flap, tracing around your top flap to indicate where the top and bottom flaps overlap (that’s a lot of -op and -ap words in one sentence, huh?).

Unfold the flaps and put glue on the spots that the top and bottom flaps intersect (inside your pencil line).

Fold the bottom flap back up and either press with your fingers or place underneath a heavy object.
Once dry, these envelopes can be used for whatever you’d like.

If you want, you can seal the envelopes with a glue stick or white glue, but your recipient will more than likely have to tear the envelope to get it open. If you’d like a seal your handmade envelopes like a normal envelope, read on for homemade envelope glue.
How to Make Homemade Envelope Glue
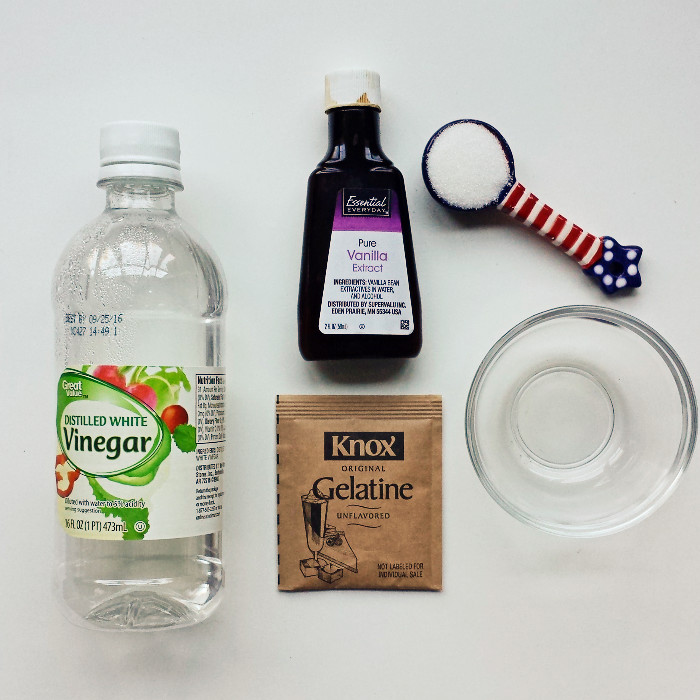
Ingredients
- 3 tablespoons white vinegar
- 1 packet granulated gelatin (unflavored)
- 1 teaspoon vanilla extract
- 1 teaspoon sugar
Microwave your white vinegar in a small container for 30-45 seconds.
Add your gelatin packet and stir to mix. I would recommend stirring right away because mine started congealing as I was taking pictures.

Mix in your sugar until combined.
Add your vanilla extract and stir to combine.


You will end up with something similar in consistency to maple syrup.
Round up an old paintbrush that you’re okay with throwing away or only using for envelope glue. (The glue gets stuck in the paintbrush and it’s hard to get out.) You may want to clean the brush beforehand. I cleaned mine with dish soap and hot water.

Use your paintbrush to paint a light line of your envelope glue onto the top flap of your envelope.


Let the envelope glue dry for about 10 minutes. Lick or moisten the glue to seal.

Find out some creative ways to address these envelopes in 7 Ways to Address an Envelope.
Looking for more paper crafts? Try homemade scrapbook paper gift envelopes.
 Previous Post
 Next Post